It’s the little things – homemade ricotta
I’ve been working lately on developing more intention in what I’m doing. I know that sounds a bit trite, and I’ve also been working lately on being less trite, but it’s true nonetheless. One of the many oxymoronic elements of my personality is that I both love and loathe routine – I love having a pattern and structure to my life, but without frequent change I become bored and irritable. When I can’t make those changes I feel entrenched, and that frustration makes it difficult to see an end-game for why I’m doing what I’m doing. These are the times I buy clothes I end up not liking after the first time I wear them, or when I lose periods of time to flailing around on the internet, or when I begin to display needless signs of defeat (“This will never work,” I’ve been known to say about … oh, anything).
And while adapting to winter life has generally been pretty easy, a fog of this helpless frustration has gradually mounted along with the cold and snow and length of the season. So I’m trying to make decisions more slowly, with a little more clarity and a lot more patience, and as is usual I can see the effect this has on what I’m choosing to cook and eat.
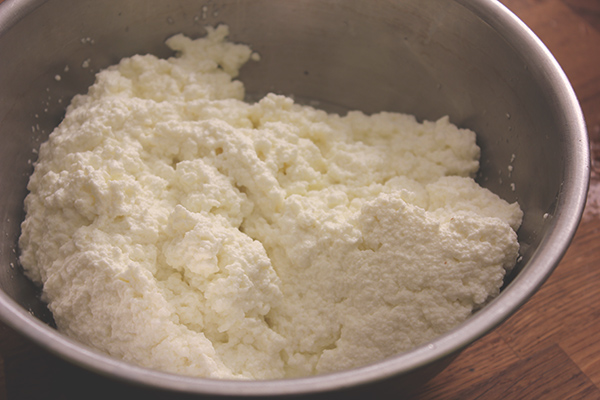
Making homemade ricotta is one of the many little grounding things I like to do in the kitchen when I need to slow down or when I’m looking for more intention. I love seeing milk turn into something else right in front of my eyes; a clear reminder of how incredible it is that this natural substance can turn into so many things and serve so many functions. I love taking this relatively easy, fast extra step to make something real with my hands that I could just as easily have bought from the store, and I love sharing the process with other people and seeing how excited they become about the creation of something new with so simple a process.
When I take the time to think about it, I can see that making ricotta is an opportunity to feel like I really made something, in a way that following a recipe really isn’t. It’s a small process: combine milk, heat, and acid, let it sit and then strain it. But doing it seems to create a connection to the food in some different way, and it feels wonderfully intentional. I’ve been doing it a lot this winter, but it took me a long time to realize this was one of the reasons why. The fact that it’s delicious and that it’s just really neat to witness it happen don’t hurt, either.
Before I ever started making ricotta at home, I didn’t really see the point of it beyond a few limited applications like lasagna. I saw it as a rather flavorless and lackluster option, as far as cheeses go, and didn’t think much about it. But after making it fresh for the first time and seeing how wonderful it could be as a fluffy, creamy base for other flavors, I began seeing potential for it everywhere. I serve it as an appetizer, still warm and folded together with fresh herbs and lemon zest and placed on a puddle of olive oil with toasted bread to sop it all up, or drizzled with honey and topped with freshly cracked black pepper. I mix it with vanilla, powdered sugar, and orange zest and spread it on graham crackers, stuff it into dates, or roll it into crêpes. I’ve also mixed it into cake batter and spread it on sandwiches and used it to boost up pasta sauces and a huge variety of other things.
If you’re looking for other ideas of how to use it, Saveur has some good ideas here. (Seriously – baked with orange blossom cherry sauce? I’m in.) I’ve also been wanting to make these chocolate/ricotta/orange cupcakes and these ricotta fritters, both vintage Orangette recipes.
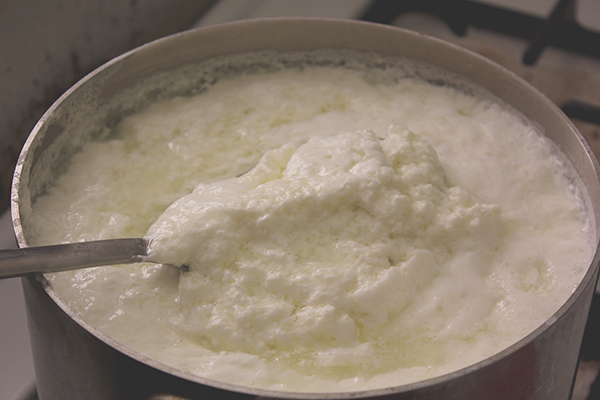
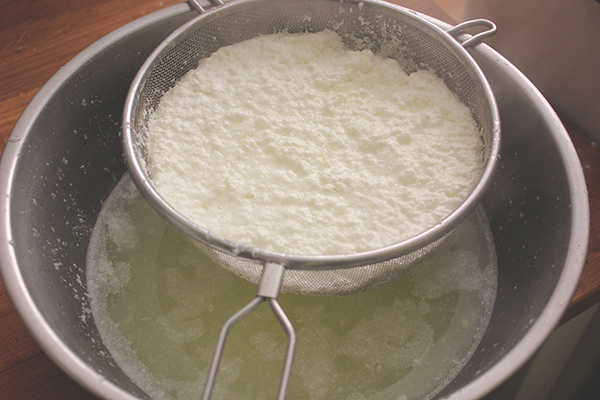
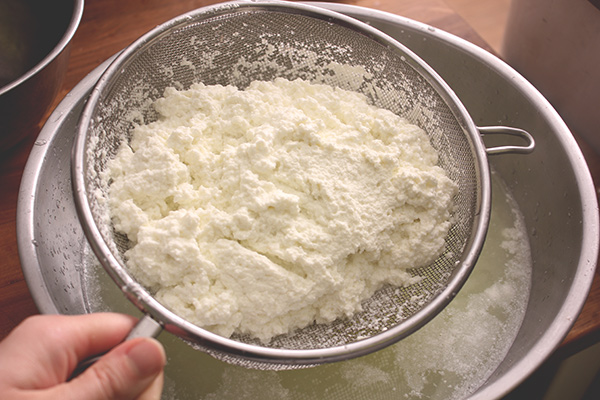
And since the process itself is pretty neat, I thought I’d talk a little more about what’s actually happening when you make it. Let’s start at the beginning. Milk and cream are combination of a variety of things, mostly sugar (lactose), fat, and proteins. Because of those proteins, milk coagulates or clots in various ways when you add acid and/or rennet and, in some cases, sometimes heat. This is how cheese, yogurt, and other thickened dairy products are made. The acid can be vinegar, lemon juice, or other acidic substances or can come by way of acid-producing bacteria, like the bacteria cultures in yogurt. The rennet can be natural, extracted from the stomach lining of a calf, cow, or other mammal, or can be synthesized “vegetable rennet” made in a laboratory. Cheeses made without rennet, like ricotta, paneer, and fresh goat cheeses, don’t melt.
Ricotta is made by adding a combination of heat and acid to milk. (Okay, so technically/traditionally ricotta is made from the whey byproduct of making other types of cheeses, not from milk or cream – but what you get out of the process I’m describing here is essentially ricotta and widely described as such, so let’s not quibble over that detail.) After you heat the milk (and cream, if you like – you’ll get a creamier, richer ricotta if you use some cream along with the milk), you turn off the heat, add the acid (I prefer plain white vinegar), sprinkle on some salt (for flavor), and let it sit for around 15 minutes while the curds form. Then you strain it in a mesh sieve and/or a couple of layers of cheesecloth, pressing more moisture out if you want a firmer product, and go from there.
One of the only tricky things with making ricotta is that the yield you get can vary slightly. I can generally depend on 1 quart of milk making about 1 cup of ricotta, but sometimes it’s a bit more or a bit less. Likewise, sometimes the liquid expelled is mostly translucent but slightly milky and yellowish in color; sometimes it’s still quite white but thin, sort of like skim milk. Either is okay. If after 15 minutes the milk doesn’t seem to be curdling as much as it as other times (after a few times, you’ll get the hang of that), you can add another teaspoon of vinegar and wait another 5 minutes to see if you get more. When you strain it, you’ll get more out of it than it looks like while it’s all in the pan.
What to do with the liquid (whey) leftovers? I’ve heard a million old-wives-tale-type answers to this question, but my favorites are that: 1) used like water in baked goods it tenderizes and boosts flavor, 2) added to soups or other dishes instead of stock it provides added richness and flavor, and 3) pets love it and can drink it without harm, unlike regular milk. I’ve also heard folks talk about drinking the whey, but I’m not particularly interested in that.
Homemade ricotta
Makes around 1 cup, scalable up to 4x (but note that once you get up to using 3-4 quarts of milk at a time, you’ll likely need to strain in batches)
Important notes about milk: The milk you use must be homogenized and cannot be ultra-pasteurized (aka UHT pasteurized). Unfortunately, this means most organic milks cannot be used to make fresh cheeses. It is possible to use 2% instead of whole milk to make this cheese, though you’ll get much less out. The higher quality milk you use here, the better the final product. Local, farm-fresh milk that tastes of grass and sunshine and frolicking cows will produce cheese that makes everyone happy!
- 1 quart whole milk, or up to 1 cup cream and the rest milk (see important notes about milk, above)
- 4 tsp. white vinegar (or lemon juice, but I find the vinegar produces more and tastier cheese)
- 1 tsp. salt
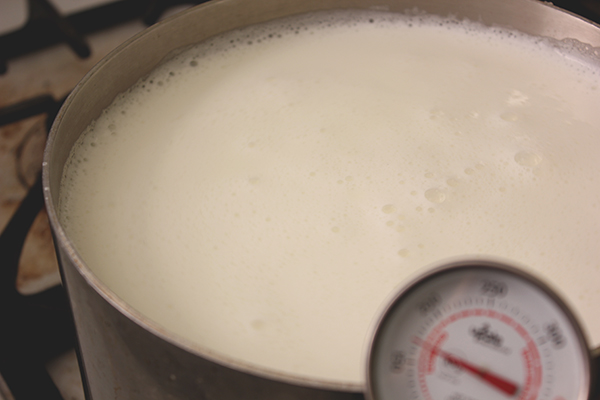
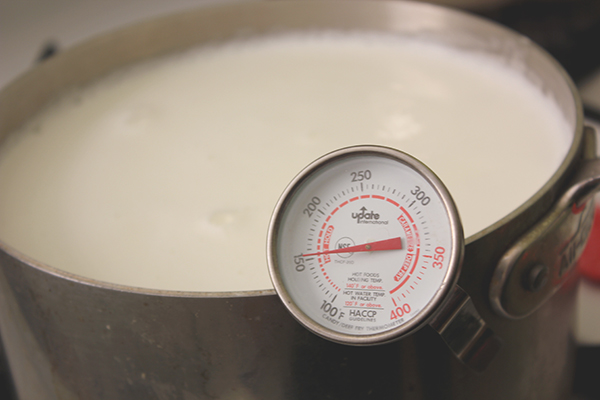
– Heat milk in a pot or saucepan over medium-high. If you have a thermometer, you’re aiming for 180F. If not, you’re aiming for spot right before the milk begins to simmer – it will develop a foamy, bubbly surface and appear sort of steamy and seething, like it’s getting ready to do something exciting. While heating the milk, stir every few minutes, making sure to scrape along the bottom of the pot. It’s easy for the milk to scorch and burn on the bottom, which can add some funky flavors. (That said, I often end up with a slight scorch spot on the bottom of the pan and it certainly doesn’t make the cheese taste burned in any way.)
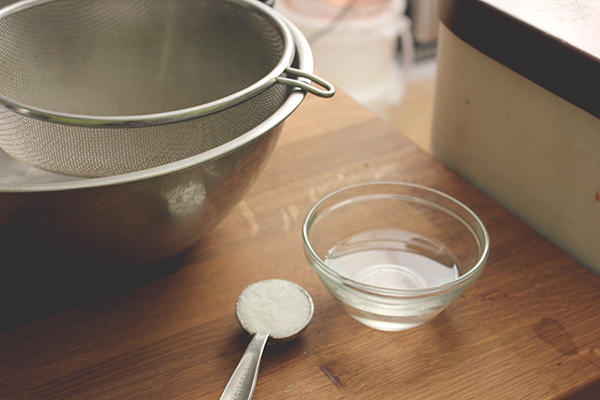
– Let sit with vinegar and salt When ready, turn off the heat and gently stir in the vinegar. Sprinkle the salt on top and let sit for 15 minutes while the curds form. Meanwhile, set up your draining apparatus. I find that my mesh strainer works quite well, as does cheese cloth or a double layer of paper towels lining a sieve or colander. Loose cheesecloth (like this) should be triple-layered, but fine cheesecloth (like this) works in a single layer, but may in fact be too fine and take longer to drain. After 15 minutes, you should notice that soft curds have formed on top of the pot and separated from a thinner liquid below. As noted above, you can add another teaspoon of vinegar and wait another 5 minutes if it seems like that’s not happening well.
– Drain your cheese Pour your curds and whey into your draining apparatus, scraping the bottom of the pot to get all of the curds. Let the cheese strain until the desired consistency – more liquid will continue to drain off for a long time (over an hour), so you can get it quite dry and firm if you like. Different draining methods will take differing amounts of time, and if you’re using cheesecloth you can gather the edges together and gently squeeze to get even more liquid out. If I’m in a rush I’ll use a rubber spatula to help get more liquid out of the curds in my sieve.
Making ahead/storage: Finished ricotta will keep in a covered container in the refrigerator for up to 1 week.






I whole-heartedly echo the sentiment of this post.